Linking travel expense receipts
In the following article, employees will learn how to link receipts and digital receipts to simplify the accounting review of travel expense reports and receipt folders.
Table of contents
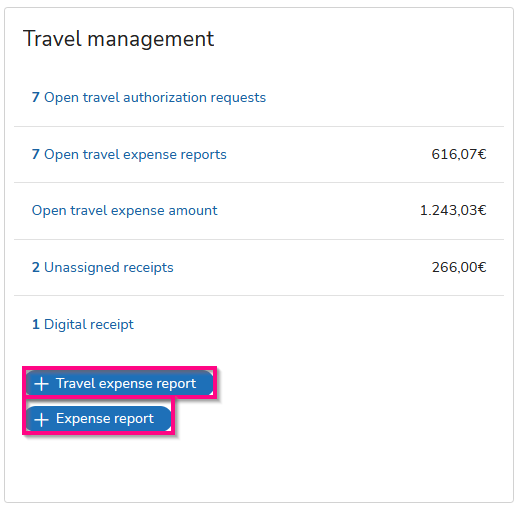
To create a travel expense report or an expense report, select the "+Travel expense report" or "+Expense report" button in the "Travel Management" tile on the dashboard.
Travel expense reports and expense reports can be differentiated and defined in the following way:
If you want to create a new trip, use the "Travel expense report" function.
The "Expense report" function helps you to enter receipts that are not related to a trip and can be defined as a expense report.

Alternatively, you can also call up the "Travel management/Travel expenses accountings" menu directly. Here you can view all travel expense reports and expense reports that have already been entered. Select the "+Travel expense report" or"+Expense report" button to enter new items.

For more information about entering a travel expense report, you can read this article:
After selecting a trip or expense report, you can upload your scanned receipts by clicking the “+Digital receipt” button in the “Digital receipts” tile.

Alternatively, you can also add your receipts directly after entering your travel data in the "Digital receipts" tile.
Upload them directly via the "+New" button or assign already uploaded but not yet assigned digital receipts to a travel expense report via "Connected receipts".
Successfully uploaded as well as assigned digital receipts appear in the list on the left side. Select the desired item here to edit it.

Below the display of the digital receipt, you now have the option to link digital receipt with receipt. If receipts have already been created, select them from the drop-down list to perform the link. Alternatively, you can use the grey "+Add receipt" button to create a new receipt and link it directly to the digital receipt. To do this, a form opens next to the digital document in which the required data can be entered.
Note: Digital documents can always be linked to several documents.

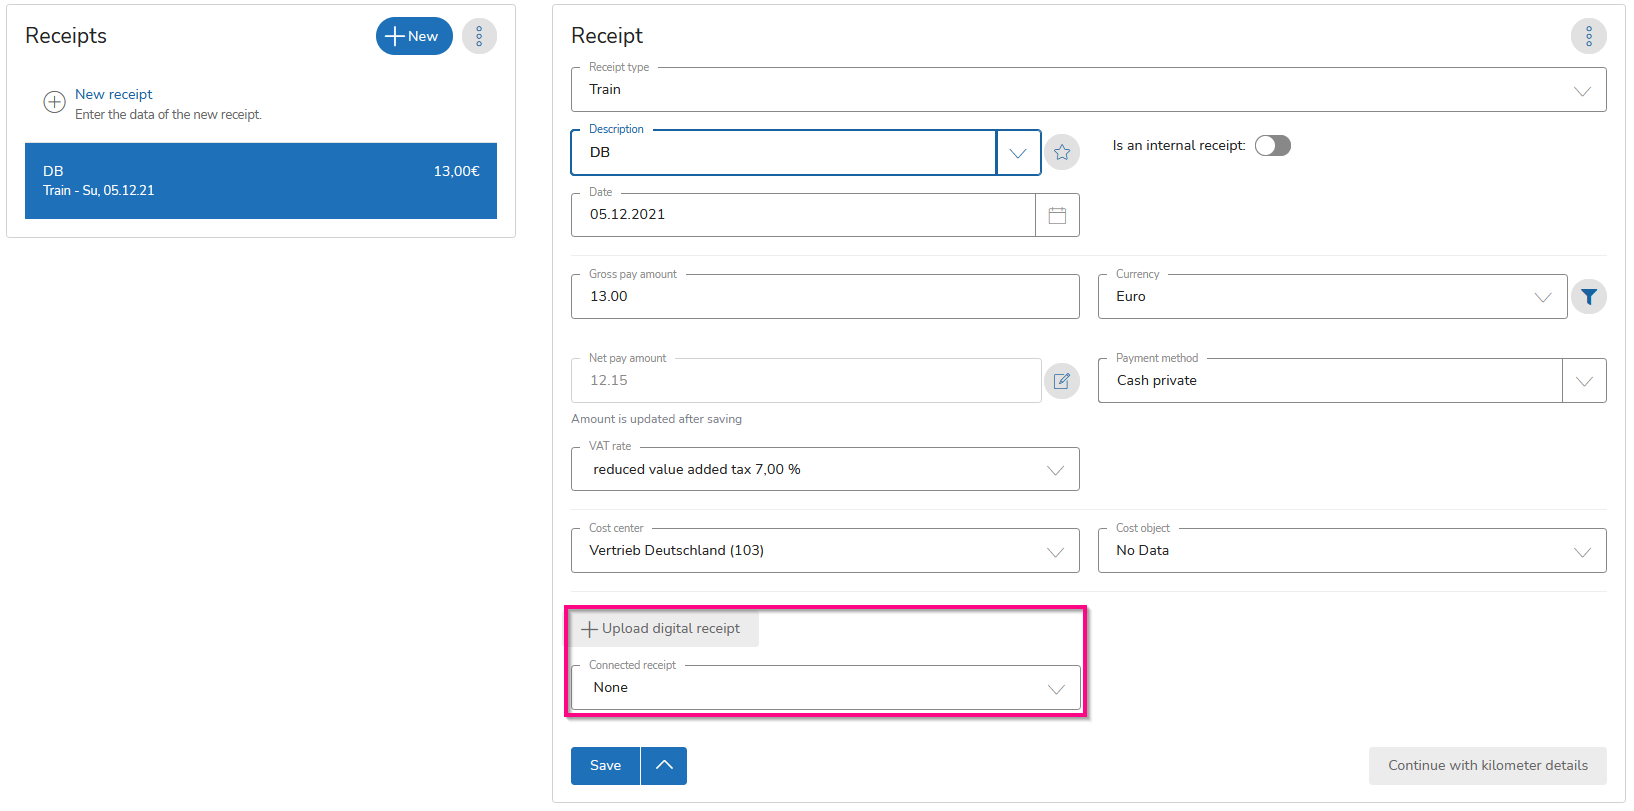
The document linking can also be done in the “Receipts” mask. Under “Connected receipt” you can select an existing digital receipt for linking or upload a new digital one by clicking on the grey “+Upload digital receipt” button.

Under "Unassigned receipts" you can also link receipts outside of trips. To do this, select the trip to which you want to link the receipts and enter the data of the receipt. Under "Connected receipt", you can select and link a previously uploaded digital receipt.

Under "Digital receipts" you can also link receipts outside of trips. Press the "+New" button to upload a new digital receipt. Now you can either select an existing trip or create a new trip on the right side. Under "Connected receipts" you can select a previously uploaded receipt and link it.

Note: The linking of receipts during trip entry makes it easier for your clerks to check the travel expense reports.
Please also note that the linked receipts are always added and removed together to the trips.
