- Introduction
- Benefit
- Activate personnel file
- Assigning access and editing rights
- Create files category
- Completely digitize and import paper files
- Uploading documents via the administrators' document collection basket
- Upload documents via employee document cart
- Release personnel file entries
- Create personnel file release via report
1. Introduction
Digitize all paper files easily in the shortest possible time and replace entire paper files. The digital personnel file manages all personnel data and documents centrally and securely, while you have the documents you need quickly at hand at all times. The digital personnel file also simplifies the management and archiving of documents through the principle of Employee Self Service (ESS). At the same time, data protection is guaranteed at all times by state-of-the-art encryption technologies.
With the digital file, the storage of personal documents such as employment contracts, application documents or social insurance documents works according to the same principle as in a file folder. You store the various personnel documents in individually definable, thematic categories, such as “certificates,” “employment relationship,” or “general personal documents. The integrated search function makes it easier to find the documents you need and eliminates the need for tedious searching through a paper file. You can also digitally record additional comments on individual file entries using an integrated note function and store and view them together with the digital documents.
All important employee documents can be stored and accessed clearly and securely in a central location. Data is protected thanks to encryption using AES-256, one of the most widely used and secure encryption algorithms.
Access to the personnel file is regulated by the proven role-based authorization concept. This means that access is only possible for authorized persons within your company.
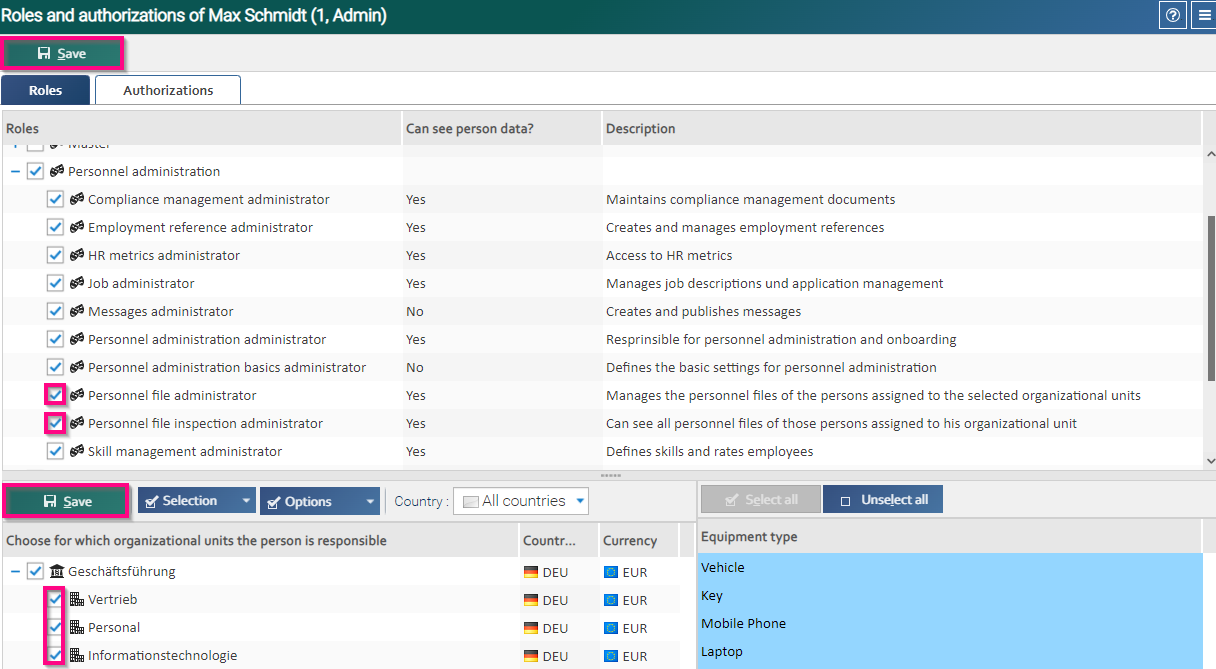
To activate the function, first select a person responsible for the personnel file in the admin-menu “Persons/Persons” and open this person by double-clicking. Then, under “Master data/Roles and authorizations”, expand the admin roles for “Personnel administration” and check the “Personnel file administrator” and the “Personnel file access administrator” boxes.
In the lower part of the screen, select the organizational units to which the assigned roles should apply. Set the checkmarks in the desired fields and confirm the selection by clicking on “Save”. Complete the entire process by clicking the upper “Save” button as well.
If supervisors or other authorized persons in your company are to be given access and editing rights to employees’ personnel files, first assign them the necessary authorization. Open the menu of the relevant persons and set the check mark under “Master data/Roles and authorizations/Authorizations” to “Access to personnel files of own employees”.

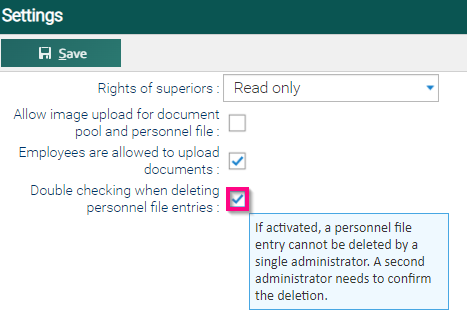
Then, in the admin-menu "Personnel management/Personnel file/Settings”, define whether these persons are only allowed to view the personnel file entries or whether they are also allowed to edit them.
Decide accordingly for read or write access. At the same time, determine whether employees can upload their documents in their own document collection basket and set the corresponding check mark.
For deleting personnel file entries, you can activate the 4-eyes principle in the “Admin/Personnel administration/Personnel file/Settings” menu. This means that two responsible administrators must always confirm the deletion of a personnel file entry. Each document that is to be deleted is requested for deletion by one administrator and must be confirmed by a second administrator. In the menu “Admin/ Personnel administration/ Personnel file/ Deletion requests” you have an overview of all entries that are to be deleted. These can be confirmed or rejected by you.
Note: The deletion as well as the confirmation of the deletion can only be carried out by persons who have the role “Personnel file administrator” for the corresponding organizational units.
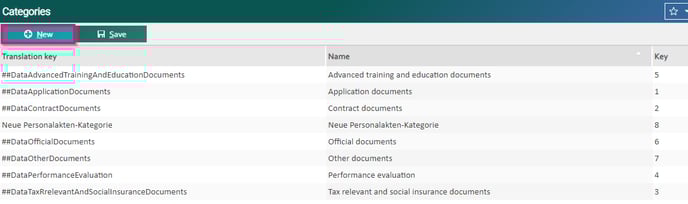
In the admin-menu “Personnel Management/Personnel File/Categories”, create or edit the file categories to which you can later assign the uploaded documents.
Use the existing categories or, depending on your needs, create additional categories in any number by clicking the “New” button. Then enter the corresponding name in the “Designation or translation key” field and save the process. The name of the file category automatically adapts to your designation when you save.
With the personnel file import, you digitize your complete paper archive in the shortest possible time. You scan and import as many personnel files as you like in one fell swoop. All paper documents are transferred to HRworks sorted by person and category. The automatic assignment is made possible by cover sheets with special QR codes that are inserted between persons, categories and individual documents during the scanning process.
In admin-menu "Personnel Management/Personnel File/Import/Tab Preparation", find the person from the list for whom you want to import personnel file documents. Create a cover sheet with QR code for each selected person by selecting that person and clicking the “Print” button.
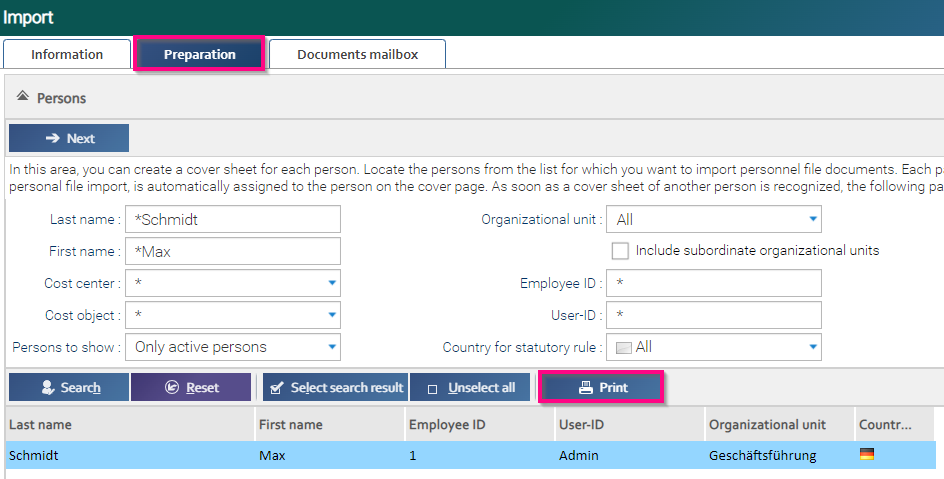
The cover sheets are automatically downloaded and can be printed directly:

Each page listed after this cover page in a personnel file import is automatically assigned to the person on the cover page. As soon as a cover sheet of another person is recognized, the subsequent pages will be assigned to this new person.
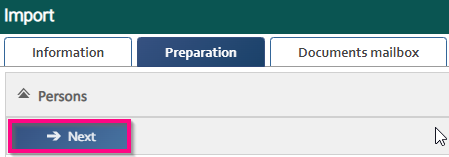
If you would like to additionally distinguish the personnel files of the selected persons by categories during the import, click on the “Next” button afterwards.
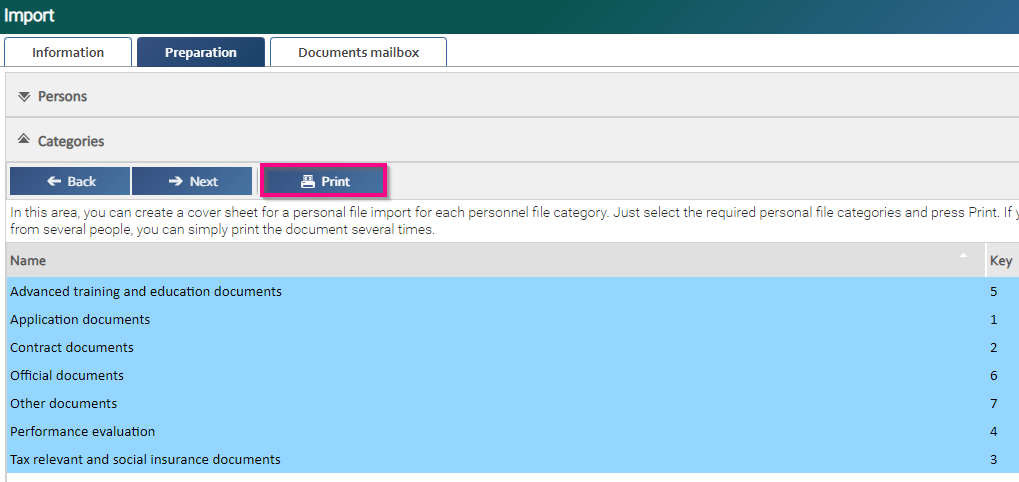
In this area, hold down the control key (ctrl) and select all the file categories that correspond to the documents of the respective employees and click “Print”.
Sort printed cover sheets with category codes between employee personnel file documents.
To be able to import the paper documents in an even more differentiated way, click on “Next” again and print out an “Element separator” code. With this cover sheet, individual documents, within a category, are separated from each other. If you want to import a cover letter and a resume at the same time, you can put the following cover sheet in between:
Thus, the personnel file import automatically contains two documents that are imported into HRworks as two independent personnel file entries with one document each.
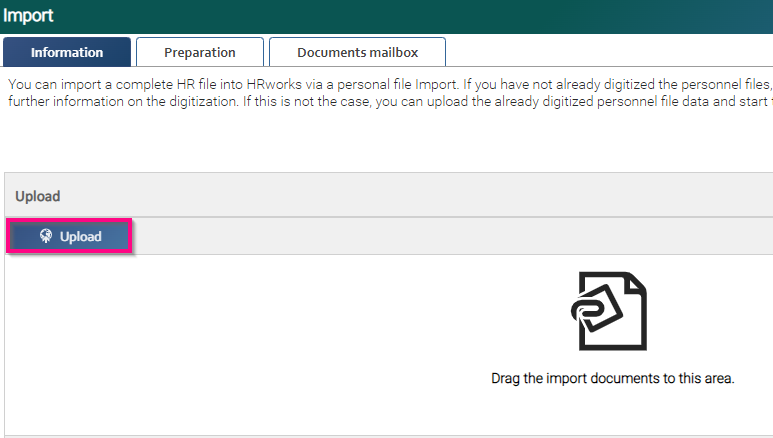
If the complete paper file with the corresponding cover sheets has been scanned, upload it admin-menu “Personnel Administration/Personnel File/Import/Information”.
Import directly by e-mail
Uploading personnel documents by e-mail is even easier. Save an additional work step and have personnel documents sent directly to the central “document inbox” in HRworks. The documents for the personnel file can be sent directly to the address of the company inbox, regardless of the e-mail program or terminal device.
You can send the scanned documents for the personnel file, sorted by persons and categories, directly from the scanner to the document inbox by having HRworks generate an e-mail address for you. These documents will not end up in your document inbox afterwards, but will be assigned directly to the respective persons.
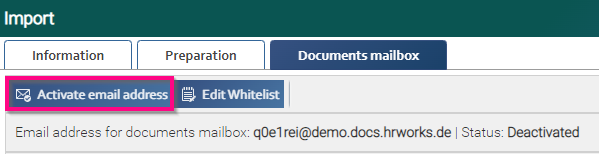
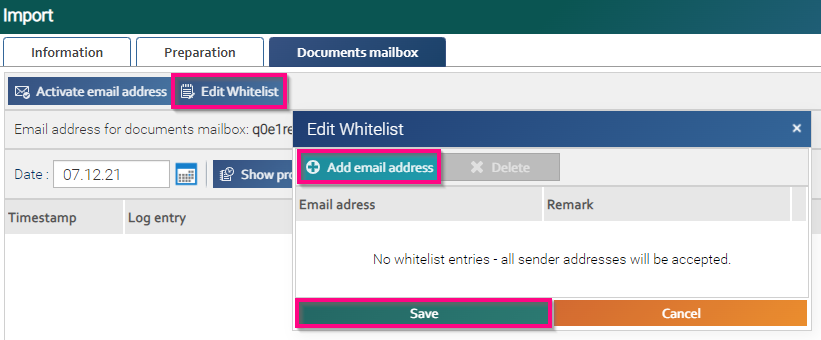
In the admin-menu “Personnel Management/Personnel File/Import → Documents mailbox”, HRworks will automatically generate an e-mail address for you in the form xxxxxxx@docs.hrworks.de by clicking on the button “Activate email address”. This sets the corresponding status to “Active”.
Also, all employees who have this email address can forward the digital documents to your “document inbox” via email.
To prevent spam, you can set up email addresses in the whitelist. This way, only documents sent from one of the specified addresses will be uploaded.
To do this, select the “Edit whitelist” button and click on “Add email address” in the following window. Now enter all desired addresses into the fields and finish the process with “Save”.
Tip: By using “*” you can allow complete domains (see example in screenshot).
Note: Please note that the uploaded documents may only be available for further processing in HRworks after a few minutes.
If you have imported your entire paper archive and only require individual personnel file documents from your employees at a later date, use the document collection basket for this purpose.
You have three options for uploading personnel file documents: Either upload the digital documents from the desktop or request them from the employees with a mouse click. If you only have the paper documents, send them from the scan process directly to your “document inbox” via an email address automatically generated by HRworks.
Directly from the desktop
Click on the “New” button in the “Admin/Personnel Management/Personnel File/Document Basket” menu and upload the scanned documents via the following window, either by dragging and dropping or by clicking on the “Attach” button.

From here, the documents can be assigned to the respective persons. Select the desired document with a click and select the button “Move to person’s file pool”.

The following message confirms the successful document receipt. At the same time, it offers the possibility to be referred directly to the document cart of the selected person.
Request documents
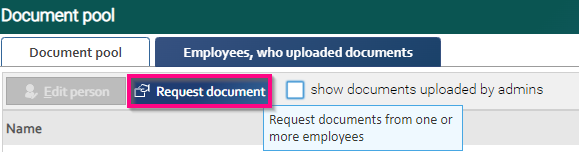
Request required documents directly through HRworks. If you have given employees permission to upload files independently admin-menu “Personnel File/Settings”, create a request for the submission of a specific document. Select one or more person in the admin-menu "Personnel administration/Personnel file/Document pool/tab Employees, who uploaded documents” and click the corresponding button.
After that, select the desired person and define the requirement in the window below:
The employee receives a notification, which they can access in their own HRworks account under “Inbox/My to-do's/My Tasks” and complete directly from here.
Back to the before mentioned admin-menu, you can open the tab “Employees, who uploaded documents” tab, where you can see which employees have added files to their own document pool. Edit them to create personnel file elements from the documents.

Employees can upload PDF documents for their own personnel file in HRworks themselves under the employee-menu “Personnel administration/Document pool” by clicking on “New”. In FLOW it would be also the same menu. As the responsible administrator, you are automatically informed about new personnel documents in the document pool and can access them directly:
After being redirected to the document pool, set a double-click to open the submitted documents of the selected employees. Either create corresponding personnel file entries for them or move them to the company’s document pool.

If you want to create a new personnel file entry, define a corresponding category, optionally also the date for resubmission as well as the creation date of the document. If the attached document requires a comment, add notes.

The personnel file entries are clearly listed under “Personnel administration/Personnel file/Document pool” of the employee and can be edited individually from here.
You can save even more time and efforts by assigning individual access rights for personnel files or individual personnel file entries. In addition, to assigning read and/or write rights for supervisors (see: 4. Assigning access and editing rights), you can also control the release of individual personnel file entries for employees to view. In addition, you can determine the duration of availability of individual personnel file entries inside HRworks.
To do that, please open the admin-menu “Persons/Persons” and release the relevant documents via “Personnel Administration/Personnel File Entries”. Select the desired document by right-click and choose “Grant access”. In the following input window, you can choose under "Release for" the relevant persons for the selected personnel file.

In the admin-menu “Personnel administration/Personnel file/Access authorization” the display is sorted alphabetically by the employees whose personnel file entries have been released. In the table you can see which administrator has granted access and who is allowed to view this file up to which date.
In the selection list “Releases for” you can change the display by selecting a person and using the button “Search” to see which entries this person has access to.

If you want to create documents from the stored document templates via a report, you have the option of creating personnel file entries from these documents. The selected documents (such as training certificates or internal safety guidelines) are thus created directly as personnel file entries for the employee.
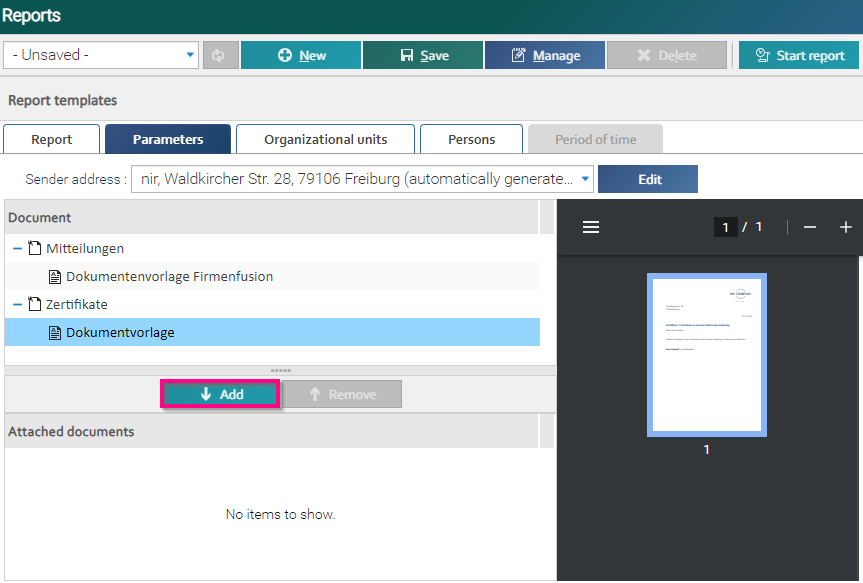
To do this, open the “Admin/People/Reports” menu and select “Documents from document templates” from the drop-down menu. Then check the “Create personnel file entries” box.

In the “Parameters” tab, select the desired documents and move them to the attached documents area by clicking “Add”.
In the next two tabs, select organizational units and persons to whom you want to assign the selected documents as personnel file entries. Once you have made your selection, click on “Create report”.

Once the report is in the “Successfully created” status, you can download it.

The personnel file entries of your employees have been created automatically as a result. These are displayed in menus of the respective persons under “Employees/Personnel administration/Personnel file entries.
